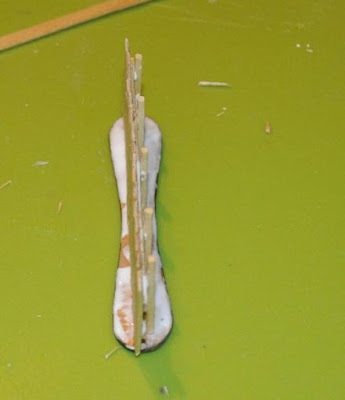
So here are my How to make you wooden fence in easy steps.
First you have to decide on fence heights, in this example I went for 30 mm of height. I built 40mm sections earlier, 50 mm shouldn't be any problem.You may reconsider the method and materials with smaller fences as it will star to look dodgy with anything smaller than 25mm cm.
I marked 30mm section on my coffee stick.
Then you have to make a supporting pieces. They are very important so you have to decide how long they should be. Best length is a 2mm shorter than whole fence section (for ease of lining them on the table and making corners. At this stage you need to decide on length of the whole section. As I went with ice cream sticks for bases I wanted it to be around 100mm long. Its worth to mention that fence itself should be a little longer than base itself (again for ease for stacking and making corners).
Then you have to gently cut a coffee stick in half..
Then its time to cut the boards themselves we marked earlier.
Then its time to dry fit everything and make supports from matches. Just shorten them from the sulfur side.
Then its time for gluing: I used both wood/PVA glue - that I recommend, and superglue that bonds faster but its more difficult to work with, and you still need wood gluo later..
After gluing first support you have to tame care for all boards finishing in line on the bottom part of the fence. Fortunately wood glue leaves our a lot of time for fitting.
So after gluing a little matchstick post to the back spread glue on the whole base.
Then wait a minut or two and just delicately take the fence up and just stick it th the gratitiously smeared in glue base.
Now wait another minute or so and take whole unit gently and apply sand to the glue at the base... and voila..
Depending on how fast you is setting you might want to use something to keep it straight during the curing process.. I use miniatures with pointy sticks.
Finished fences look like that:
They could even work as is without painting - as you see coffee sticks have nice weathered and different colors. Its best to paint sand on the basses though, unless you are going for desert town.


Bardzo fajny tutek AWu :)
OdpowiedzUsuńNie gadać tylko zrobić i wrzucić zdjęcie.
UsuńBardzo dobry tutorial. W 28 mm musi wyglądać super. Iście samurajskie.
OdpowiedzUsuńWielka szkoda, że do 1:72 to ciut za duże, niestety.... :(
30mm na duzy parkan jest idealna..ujdzie nawet w 15mm
Usuńdlatego zrobiłem kilka takich mniejszych.
Nicely done!
OdpowiedzUsuńThanks!
UsuńNice topic,I like all Scratch Builders. BB
OdpowiedzUsuń